Faces Tutorial
Here is how I make the "Faces" for my Comfort Dolls.
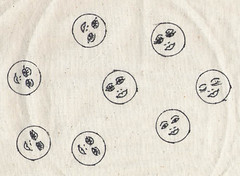
The first step, above, is to draw around a 20 cent piece, on whatever fabric comes to hand. I have been using calico (which I think means something else other than in Australia). The weave is a little open.
I draw with a fine-tip fabric marker. If you do not like the strong black line, you could try using a grey-lead for the circles.
The fabric then goes to my mother, who draws simple faces in the circles. I have taken a liking to one she does with closed eyelids, and asked her to draw more of them.
The pictures seem to come better if the fabric is hooped with something resting underneath.
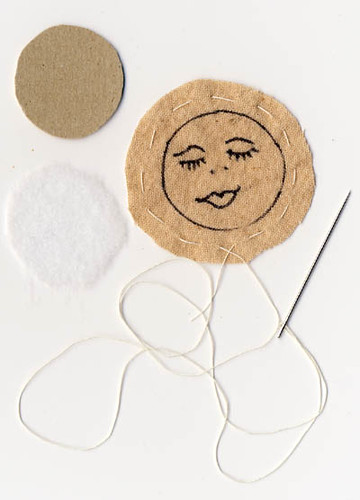
I then choose a face, and cut around it with an allowance of about half an inch. In this one, I am trying for something other than stark white - I should not assume that all people have the same skin colour as mine. So this one has been boiled with a teabag and salt. If necessary I will touch it up further at the end with pencils.
At the same time, cut a circle of light cardboard slightly smaller than a 20c piece, and a circle of wadding the same size. This wadding is a bit thicker than I like, but will do.
Run a line of gathering stitches around the face.
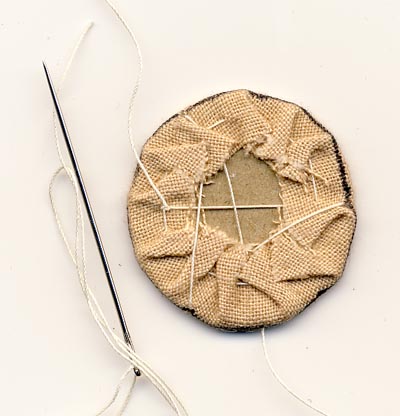
Lightly pull the threads to bunch up the face, the put the wadding in, then the cardboard. Pull the threads more tightly and tie off.
Lace the ends of the threads from side to side on the reverse, then use the thread to sew the face in place, using tiny stitches in about eight places on the edges.
It then looks like this:
Ornament as required around the edges. I use one or two rows of beads.
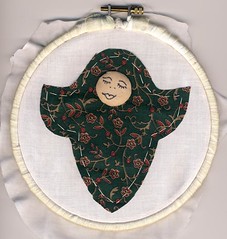
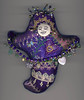
Spirit #5 (aka Comfort Doll #4) is ready to be born. I think I will be beading the design - not sure yet.
posted by Linda at 7:08 pm
![]()
![]()


9 Comments:
Thanks so much for that Linda, fabulous!
Another doll on which to work - beads would be nice.
I like how the face gets a bit of
dimension with your method. I'm going to try it next doll. Thanks for sharing this.
Linda, I've given you an award! Please stop by, to pick it up, when you have a moment.
Linda, your dolls are all so beautiful! I could stare at them all day.
Calico in the US means cotton prints used for patchwork quilts. I think we call the fabric that you're using Muslin.
Thanks for the tutorial on how your faces are done. They're so pretty and I like the ones with the closed eyes too!
a little tip to make life easier for mum: iron some Freezer paper [ or the poor woman's version - the wrapper the printer paper came in ] onto the back of the fabric before drawing the faces. She won't need to hoop them anymore !
Thank you SO much of your tutorial!
I've just started making dolls & it was the face I've been struggling with & I just know your technique is going to help!!!
Thanks!! ^____^
What a great technique! It's inspired me! :-)
WOW they are lovely and I too like the closed eyes one the best but then there's one that reminds me of a sassy gal!!!
You are very generous. This tutorial will be the beginning of some good ideas--I think--of mine.
Thank you!
I will also follow your Flickr stream.
Post a Comment
<< Home