Making Dragonfly Wings III
This is the final section for making a Dragonfly wing - I just need to multiply it by four, so the Dragonfly has enough wings to fly with.
For previous instructions, see Part I and Part II
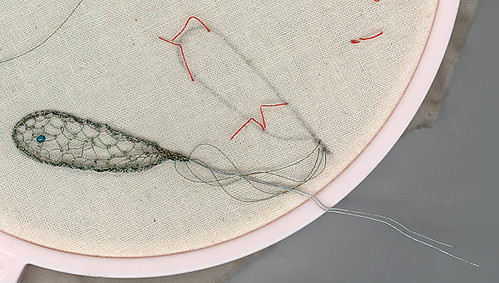
The next step is for me to cut between each couching thread on the reverse, and either unpick or cut near the anchor point for the metallic threads. The reverse then looks like this:

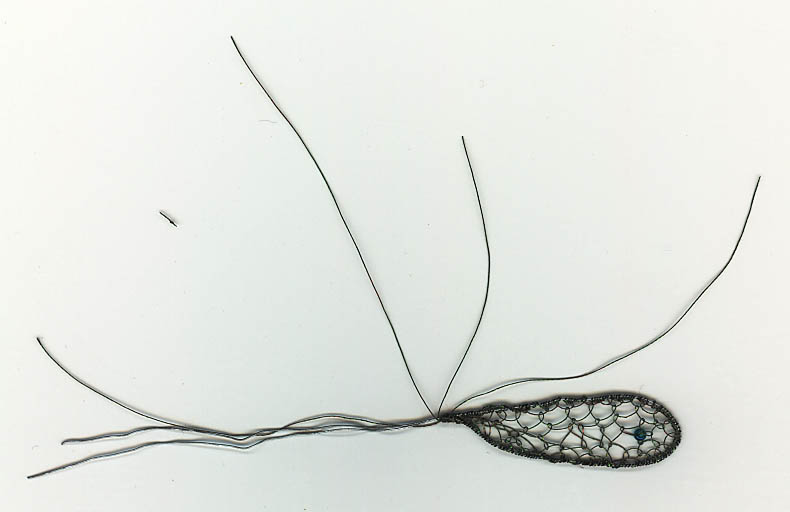
Then, very gently, lift the wing off the fabric, like this - the metallic threads are still being pulled through the fabric - you can see how they are all at the same point.
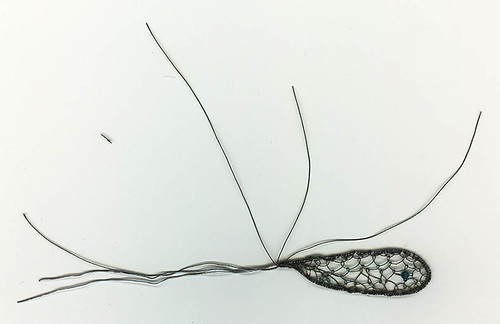
This is how a single wing now looks:
There is a larger size HERE.
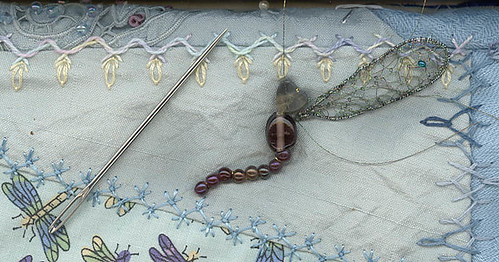
Next, I go to where I have already sewn a body in beads onto my work - remembering all insects are in three parts - head, thorax and abdomen. The wings always come off the thorax, so I make a hole beside it with a large needle, and poke the wires through.
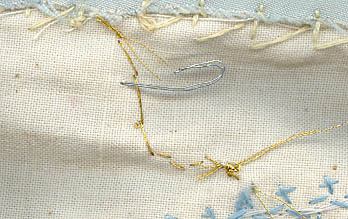
This is then the reverse of the work - I have shortened the wires and turned the ends on themselves. I then use the four ends of the metallic thread to stitch them down on the reverse, going only through the backing fabric. It is important to make sure some stitches are in the curve, to firmly anchor the wire. If there is not enough metallic thread I can use another thread to make sure they are firmly secured.
I then have a one-winged dragonfly - so I repeat this process three times, sewing the second wing on the same side slightly below the first.
As long as I am gentle, I can then slightly manipulate them to the position I want.
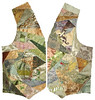
And, when I finish this one, I need to do another set for my Country Garden Sampler - which is what I invented them for first. I just keep using each set on a new dragonfly, and never get to put them on that UFO.
As long as I am gentle, I can then slightly manipulate them to the position I want.
And, when I finish this one, I need to do another set for my Country Garden Sampler - which is what I invented them for first. I just keep using each set on a new dragonfly, and never get to put them on that UFO.
posted by Linda at 7:25 am
![]()
![]()


4 Comments:
Thank you sooooo much for taking the time to show us this technique, Linda!!! Wow!!! Those wings are absolutely gorgeous! Soooo delicate....gonna have to give it a whirl sometime!!!
Linda, this has been absolutely facinating! Thank you so much for taking the time to walk us through this technique. I've added it to my mile-long list of new things to try!
Linda,
What a spectacular set of wings! I just love them and can't wait to try to make some myself. You've explained it very well, pictures and all.
Verrrrrry nice.
Dusty in Colorado
Linda, you're amazing. This is the type of thing I just look at and am amazed that people try! I've looked at that country garden sampler trying to figure out how many hours it would entail. I am in awe!!
Post a Comment
<< Home